Review & Application Of Barry M Instant Nail Effect!!
Today i am going to do a review and tutorial of barry m instant nail effect nail paints. The nail efftect paints from barry m come in four block colours :
Black Magic
Pink Fuzz
Blue Print
White Frost
You can purchases these paints from www.barrym.com,superdrug or boots all four paints cost £3.99. With the nail effect paints you are meant to paint your nail with a polish then let them dry as normal then you apply a single coat of the instant nail effect and then the effect will appear before your eyes. Here barry m statement about the paints:
" Instant Nail Effects is a simple to use nail paint that creates this amazing effect on your nails in one simple stroke. Or play around with it to create different effects."
So i have heard alot about these paints and i had seen them a couple of times when i was i superdrug so i thought for only £3.99 i would give it a try. So when it came time to purchases it in my local superdrug they only had the colour pink fuzz left so i knew they had been selling well but the down side is i had the unpopular colour lol ohwel i thought i will be different then lol. So lets begin:
The Products & Tools I Use When Doing My Nails
My Nail Effect Paint In Pink Fuzz
Barbara Daly Nail Polish In Plum Pudding
Nail Essentials Base Coat
Sally Hansen Strengthening Nail Polish Remover
Doublebase Gel For My Hands
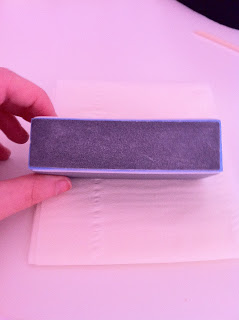
3 Way Shiner Block
Nail File
Brichwood Stick
Cuticle Pusher
Step 1:
I start by removing all previous nail polish with my sally hansen nail polish remover on both hands.
Before
After
Step2
The i take my nail file and begin filing my nails to my desired shape on both hands.
Step 3
Once i have filed my nails i then take the birchwood stick and begin cleaning the free edge of my nail.
Step 4
Once i have cleaned all free edges of my nails i then move on and take my cuticle pusher and push my cuticle down and remove the dead skin.
Step 5
Now that i have pushed and removed the dead skin i then take the 3 way block and i take the dark grey side and begin buffing my nails
then i take the white side and begin to buff again
and then after that i take the light grey side to polish the nail
Step 6
Now that all the nails are buffed and polish i then take the nail polish remover and remove all nail dust away and then take the hand cream and apply all over the hands.
Step7
After you apply the cream we then apply our base coat.
Step 8
Once the base coat is applied to all nails we then move on to taking the nail colour and applying our 1st coat
.
And then apply 2nd coat once 1st coat is dry
Step 9
Now once you have applied the colour take the nail effect paint and using one single coat apply it to the nails.
And once you have applied a single coat to each nail we wait for them to dry and we are left with the end result.
So my overall thought of the nail effect paint is that its amazing gives such a unique look to your nails because sometimes i just get bored of polish and want something different well i know i do so this is right up my street and i really love the end result my only down side is i wish the application brush was a wee bit bigger cos it doesn't cover all the nail so your 1st instinct is to apply another layer which you can't do but other than that i love it and i think i will be purchasing the rest of the colours.
So Until Next Time
Love Nicola xoxo


Oh wow, this was a really interesting post. What a brilliant and unique idea. Thank you for posting. You have a wonderful blog.
ReplyDeleteI wish you all the luck in the world with your beautiful blog (although I am sure you don't need it).
All the best,
Voe.
____________________________________
http://lipstick-and-pearls.blogspot.com